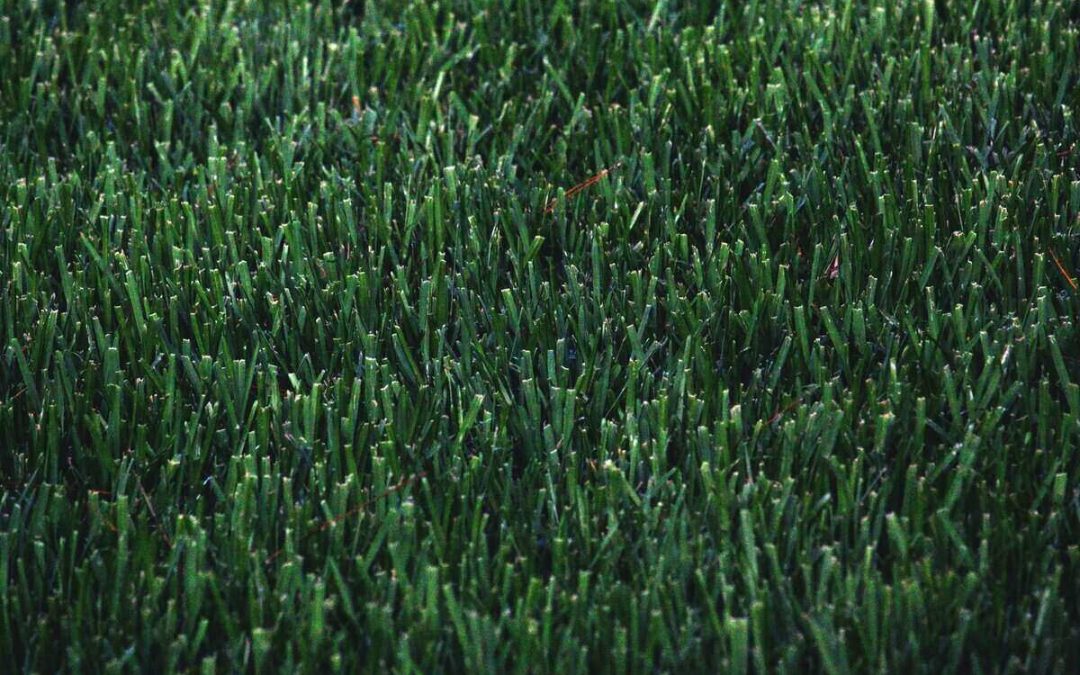
Too much shade is one reason some homeowners turn to artificial turf to achieve a distinctive green lawn. You can save a lot of money if you know how to install artificial grass yourself.
In this article, we’ll make it easy to DIY your new lawn by giving you the steps to install artificial grass, from base preparation, to installing to the finishing touches. We’ll also cover the numerous benefits.
5 Steps to install artificial grass:
1. How to prepare the area for artificial grass
2. Measure and lay out the artificial turf
3. Artificial grass installation
4. Secure edges and finish
5. Infill
6. Benefits of artificial grass
7. FAQ
How To Prepare For Artificial Grass Installation
Once you’ve decided to make artificial grass part of your landscape, decide exactly where it’s going. This type of synthetic turf requires a level and smooth surface. If your traditional lawn slopes, you can still install artificial grass, but the slope must be smooth. Find the right spot and begin the 5-step process of prepping the ground.
1. Dig the Base
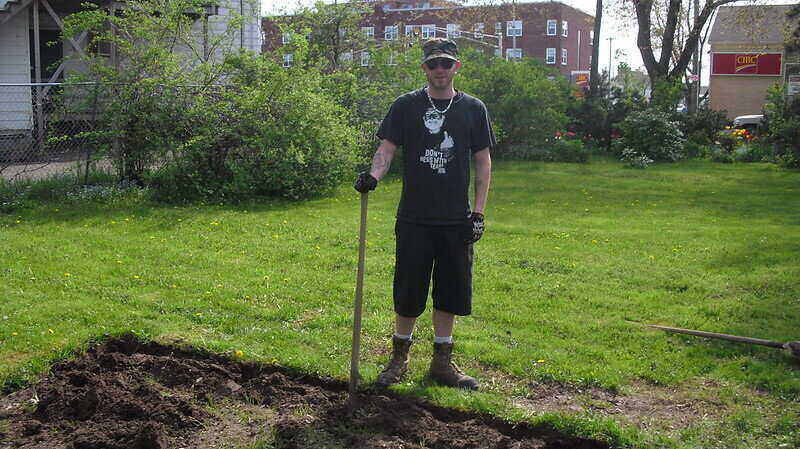
You can’t throw a blanket of artificial turf over your lawn and call it a day. You must remove the natural lawn by digging about 4 inches into the soil. Renting a sod cutter will make this less of a hassle than using a shovel. If the ground is wet, wait for it to dry before you start.
If you don’t create an appropriate, level base before you lay artificial grass, holes may form, causing the grass to become uneven and pull away from the edges.
2. Install Border or Edge

There’s one school of thought that synthetic grass doesn’t need a border, but if you want a natural lawn look that lasts, it’s best to install one. The vast majority of professional artificial grass installers will tell you it’s a necessity and has numerous benefits.
- Keeps base materials contained, fending off erosion
- Prevents nails or spikes from coming loose
- Provides fake grass with something to sit against (so the edge of the turf isn’t exposed)
- Gives a polished, expensive look to the artificial lawn
You have several options when it comes to choosing materials to create a hardscape.
- Pressure-treated timber – Quick to install, easy to cut and trim, and cost-efficient. The downside? Even treated timber will eventually rot. You can expect it to last about ten years.
- Composite edging – Has the look of wood and is easy to install but lasts up to 40 years longer than actual lumber. Up to 95% of composite edging is made from recycled plastic. It can be bent and curved to fit your landscape.
- Steel edging – For a nearly indestructible border without the glamor, steel does the trick. It’s easy to install and can be shaped into curves that follow your natural lawn space. More expensive than lumber, steel edging costs about the same as composite.
- Pavers of brick, stone, or concrete – These give a more elegant look to your landscape. They’re durable and cost-efficient, depending on which material you choose. Hardscape pavers can blend in with the artificial grass or stand out from your landscape. You can lay them in a curve to follow your lawn once you install the artificial grass.
3. Create a Proper Drainage System
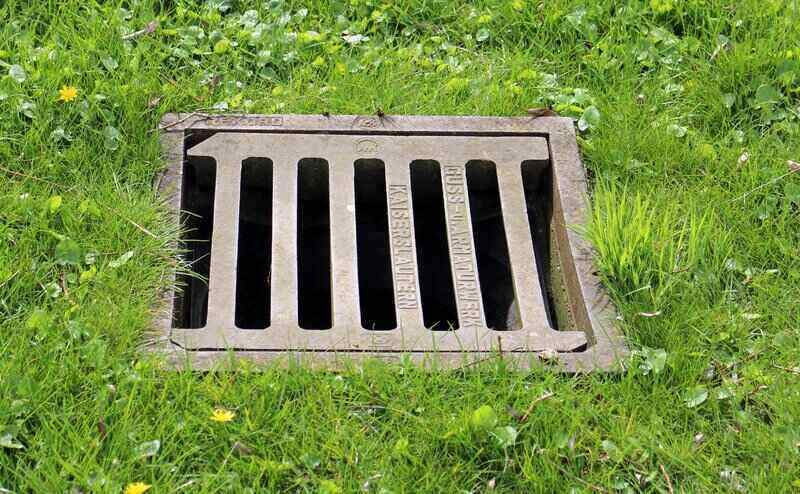
Properly installed artificial grass drains quite well, even better than real grass. The base actually acts as a drainage system. When that’s not enough, excess water may lead to lumpy grass, moss and algae, bacteria buildup, and expensive repairs or replacement.
Turf for sports fields, play areas, and heavy foot traffic comes with tiny drainage holes in the backing. This lets water pass through the grass, into the absorbent materials (aggregate) underneath. However, living in a wet climate may create the need for a bit more help, as does having soil that doesn’t drain well, like clay.
Installing a drain or drainage grates at the lowest edge of the artificial grass is one way to give runoff somewhere to go. You can also dig a channel or French drain or install piped land drain.
4. Lay the Base
The last thing you want are weeds poking through. Put down a weed barrier. Sometimes called landscape fabric, it’s material with a mesh-like texture that’s thick enough to stop weeds from growing but porous enough to allow for runoff.
Roll the barrier out over the entire area and let the edges overlap. Keep it in place by putting in landscaping staples every 4 feet or so.
5. Lay Down Aggregate.
This can be sand, gravel, or crushed stone and is a must under your synthetic grass. Choosing the wrong aggregate may cause wrinkling or buckling in your artificial lawn and prevent proper runoff.
The best ground cover is called crushed miscellaneous base, or CMB, made of recycled concrete or asphalt with a sand-gravel mix of different sized pieces. Decomposed granite also makes an excellent base for installing artificial grass and handles runoff slightly better than CMB.
Spread the aggregate over the weed barrier, covering the entire surface, 3-4 inches deep. Dampen the area with water and start compacting the rock. Then use a vibratory plate compactor (you can rent one from a home improvement store) until the surface is smooth.
Measure and Lay Out the Artificial Grass
Now you’re ready to install the artificial grass. Let’s talk a bit about the type of grass you’ve chosen.
Artificial Turf Types
An artificial lawn should look like natural turf; realistic with a soft texture that feels good. Dense blades of synthetic grass create a lush, natural lawn look that holds up under heavy foot traffic.
- Polypropylene artificial turf is the cheapest option but not necessarily the best. It’s not very tough and is easily damaged. It’s recommended you only use this type of synthetic grass in small areas.
- A step up is polyethylene synthetic grass. It costs a bit more, but also looks and feels more like real grass. It holds up to heavy use and homeowners use it for all applications, creating a gorgeous green lawn. Fake grass made from polyethylene is recommended the most due to its versatility.
- The third choice for a low-maintenance artificial lawn is nylon. This is the most expensive of the three and the most durable. It keeps its shape, even in hot climates and heavy use spots like play areas. Most people who install artificial grass avoid this option because the blades are stiff and it’s costly.
Artificial Grass Installation
- Roll out the turf -Rolls of synthetic turf are typically 12-15 feet wide and cut to length. Be sure you have enough square feet to cover what used to be your grass lawn. Lay flat and let it sit in the sun for 30 minutes or so. This way, it expands before it’s installed.
- Roll it out so the blades lean toward your house – Artificial turf doesn’t stand straight up, it has a slight bend.. If you’re using more than one roll, be sure they face the same direction. Failure to do this creates a messy, fake grass look.
- Put the edges together so it looks seamless -You want the two pieces to meet without overlapping. For more than one roll of synthetic turf, you’ll need a razor knife or carpet cutter to trim from the back so you don’t nick the grass.
- Join the pieces with seam tape – Add synthetic grass glue on top of the tape and lay the pieces together. Let the glue set for 15 minutes. Trim the outside edges of the synthetic grass to fit your lawn area.
Secure Edges and Finish
Your new synthetic turf is down and it’s time to make sure it stays put. Use 5 inch lawn spikes or non-galvanized turf nails. These are not coated with zinc, as a little rust actually helps the nail expand, and hold down the carpet. Hammer the nail firmly but not too hard to avoid creating dips in the turf.
For the most natural look:
- Spread the blades of the artificial grass out and away from the nail
- Gently hammer the nail or spike into the ground
- Brush the blades upward to hide the nails
Place the nails every 6-8 inches around the perimeter of the artificial lawn. Then, hammer a nail in the inside area of fake grass every 2 feet or so.
Infill
The final step in laying artificial grass is adding infill. This is any type of material that goes between the blades of fake grass. Some sports teams, including several in the NFL, play on synthetic turf where ground up rubber is typically used as infill, but silica sand is considered the gold standard for homeowners.
Benefits of Infill
- It keeps the blades from breaking or becoming matted.
- Natural grass blades stand up straight because the roots are anchored in the soil. Infill brings that same look to your artificial lawn by giving it shape and stability.
- It increases the lifespan of synthetic grass by acting as a barrier between the woven backing and heavy foot traffic.
- It assists in runoff, as it’s porous enough to let water and air pass through.
So how much infill do you need for your artificial lawn? The recommendation is 2 lbs. per square foot. That’s usually enough for a residential yard with average use.
For best results follow these steps:
- Use a rake or power broom to get the blades of the fake grass as upright as possible (this allows the infill to get into the gaps)
- Put the infill in a drop spreader or a fertilizer spreader to parcel it out evenly
- Make one pass, then brush the synthetic grass to push the infill in as deeply as possible
- Repeat until you have the depth you want
Be sure to use enough infill but not too much. You don’t want to see it sitting on top of your artificial lawn. Use a broom to remove any excess or spray with a garden hose. The goal is to make the infill as invisible as possible, even up close. Wait at least one night before using your new green lawn.
Benefits of Artificial Grass
Your artificial lawn is practically maintenance-free. You don’t have to worry about mowing, fertilizer, weed killers, lawn diseases, common insects, or lawn munching rodents. It’s why is one of the best grass alternatives to consider. You can get rid of the sprinklers and say goodbye to high water bills.
Your new turf area is also pet-friendly. Many animal shelters use SYNLawn for their dog run areas because the turf is easy to hose off after the animals do their business.
Like the idea of a labor-free lawn, but don’t want to face the labor-intensive task of artificial grass installation? We can help you find a landscaping professional near you.
You’ll soon have more time for you and your family to enjoy the new landscape design with some yard games (skip those that use sharp objects!). Then, say goodbye to the lawnmower and hello to the look of a traditional lawn without the upkeep.
FAQ About How to Install Artificial Grass
1. What kind of maintenance does artificial grass require?
You’ll need to use a blower regularly. A leaf blower does the trick to keep leaves, sticks and branches, and other debris off your artificial turf. And hose it down 2-3 times a month to get rid of smaller dust and dirt.
Use a stiff bristle broom and brush your synthetic lawn once a month. This keeps the blades standing upright and improves the appearance.
2. How much does an artificial lawn cost?
The cost varies depending on the brand you choose to install and whether you DIY or hire professional installers. The average price is $12.33 a square foot with a 500-square-foot lawn costing between $3,000 and $7,300.
3. How long will my artificial lawn last?
The lifespan of an artificial lawn is anywhere between 10 to 20 years, depending on how well you take care of it and the brand you choose. Some borders, especially timber, will have to be replaced every 10 years or sooner.
Don’t have the time or energy to install an artificial lawn? We can find a landscaping pro near you to install it for you.
Main photo credit: Wendy Aros-Routman | Unsplash
